Table of Contents
- What Is a DIY Sensory Wall for Toddlers?
- Developmental Benefits of a Sensory Wall for Toddlers
- Safety First: Essential Guidelines Before You Build
- DIY Sensory Wall Ideas for Toddlers
- Texture Panels: Fabrics, Foam, Cork, and Natural Elements
- Color and Light Features for Visual Engagement
- Sound Making Elements: Crinkle Panels, Bells, and Chimes
- Interactive Activity Panels: Zippers, Buckles, Velcro, and Buttons
- Water and Sensory Play Wall Features for Outdoors
- Mirror and Reflection Panels for Self Awareness
- DIY Sensory Wall Ideas Specifically for Toddlers with Autism or SPD
- Sensory Wall Ideas for Different Settings
- DIY Sensory Wall for the Home Playroom or Bedroom
- Sensory Wall for Preschool and Classroom Environments
- Outdoor Sensory Wall Ideas for Backyards and Playgrounds
- Step by Step: How to Build a Simple DIY Sensory Wall
- DIY Sensory Wall vs. Ready Made Sensory Wall Panels
- FAQs
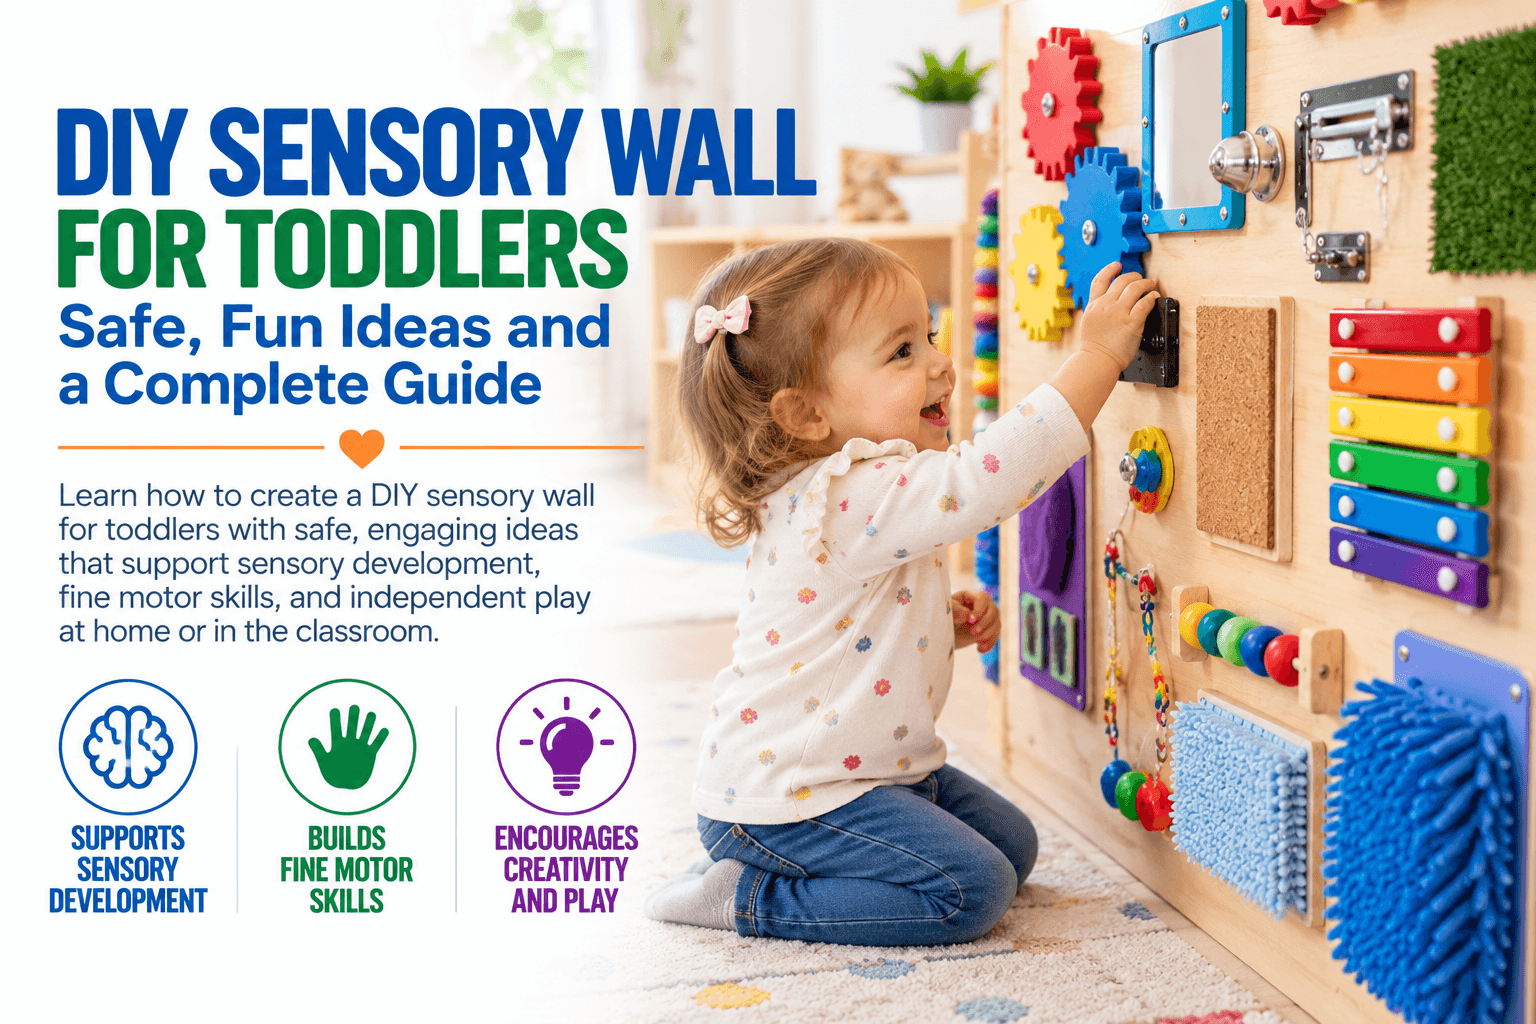
A DIY sensory wall for toddlers creates a hands on space where young children can explore textures, colors, movement, sounds, simple cause and effect activities, and early fine motor challenges. Sensory walls can be built at home, in preschool classrooms, therapy spaces, or outdoor play areas and customized around the child's age, abilities, interests, and sensory preferences.
A sensory wall does not need to be elaborate. A thoughtfully designed wall with a few secure, age appropriate activities can provide opportunities for exploration, play, communication, and skill building without taking up much floor space.
For additional sensory activity ideas, explore Sensory Development at eSpecial Needs.
What Is a DIY Sensory Wall for Toddlers?
A DIY sensory wall is a wall mounted collection of interactive materials that toddlers can touch, move, open, close, press, turn, look at, or listen to.
Common sensory wall elements include:
- Different textures
- Child safe mirrors
- Large switches or buttons
- Zippers and buckles
- Spinning elements
- Sliding pieces
- Color panels
- Simple sound makers
- Large gears
- Fabric panels
- Cause and effect activities
Instead of giving a toddler several loose sensory toys, a sensory wall keeps activities organized within a defined play area.
This can be especially helpful in smaller rooms where floor space is limited.
How Sensory Walls Differ from Sensory Boards and Sensory Rooms
Sensory walls, sensory boards, and sensory rooms serve similar purposes but differ in scale.
A sensory board is usually a smaller portable or mounted panel containing several hands on activities.
A sensory wall may combine multiple panels or activities across a larger vertical area.
A sensory room is a complete environment that may include seating, swings, lighting, tactile equipment, soft play products, visual effects, and other sensory equipment.
A DIY sensory board is often the least expensive and easiest option. A sensory wall offers more room for activities without requiring the space or investment associated with a complete sensory room.
Schools and therapy programs considering a larger environment can also read The Complete Guide to School Sensory Room Equipment.
Who Can Benefit: Toddlers, Kids with Autism, and Beyond
Sensory walls can be engaging for many children, including:
- Toddlers exploring cause and effect
- Preschool children
- Children developing fine motor skills
- Children with autism
- Children with sensory processing differences
- Children with developmental delays
- Children who enjoy repetitive hands on play
- Children working on reaching or coordination
Not every child responds to sensory input in the same way.
A bright, noisy feature that one toddler loves may be uncomfortable for another. Sensory wall design should therefore be based on the individual child rather than a diagnosis alone.
For more information about sensory differences and play, see Sensory Development Activities and Tools for Children With Special Needs.
Developmental Benefits of a Sensory Wall for Toddlers
A sensory wall can combine play with opportunities to practice several early developmental skills.
Depending on the activities included, children may have opportunities to work on:
- Touch exploration
- Fine motor control
- Hand eye coordination
- Visual attention
- Cause and effect
- Problem solving
- Reaching
- Bilateral hand use
- Vocabulary
- Turn taking
- Independent exploration
A sensory wall should be viewed as a play and learning environment rather than a treatment by itself.
Tactile Exploration and Fine Motor Skill Building
Texture panels encourage toddlers to use their hands to explore surfaces that feel different from one another.
Possible textures include:
- Smooth
- Soft
- Bumpy
- Fuzzy
- Firm
- Ridged
- Squishy
Activities involving turning, pulling, opening, closing, sliding, and pressing can also challenge the small muscles of the hands.
These movements are related to skills children later use for dressing, manipulating toys, drawing, eating, and other everyday activities.
Explore Tactile Stimulation and Fine Motor Tools for additional hands on activities.
Visual Stimulation and Cognitive Growth
Colors, shapes, patterns, mirrors, moving objects, and visual cause and effect features can encourage attention and curiosity.
A toddler might:
- Follow a spinning object with the eyes
- Match colors
- Notice patterns
- Watch an object move through a track
- Discover what happens after pressing a button
These simple experiences introduce early concepts such as cause and effect, matching, object movement, and visual tracking.
Sensory Regulation, Calm Behavior, and Emotional Development
Some sensory wall activities may provide a predictable way for children to interact with preferred sensory input.
Repetitive activities such as turning a wheel, rubbing a texture, or watching a slow moving visual feature may feel enjoyable or calming to some children.
Other children may become more alert or excited by the same activity.
There is no single sensory feature that automatically produces calm behavior.
Observe the child's response and adjust the wall accordingly.
For ideas about creating a quieter sensory environment, read Designing Sensory Calm Corners for Autism, ADHD, and Emotional Regulation.
Language and Social Engagement Through Play
Sensory walls can also create natural opportunities for conversation.
Caregivers can introduce words such as:
- Soft
- Rough
- Open
- Close
- Push
- Pull
- Up
- Down
- Fast
- Slow
- Red
- Blue
- More
- Finished
Two children using the wall together can also practice waiting, sharing space, requesting a turn, and observing what another child is doing.
Safety First: Essential Guidelines Before You Build
Safety should determine every design decision on a toddler sensory wall.
Toddlers pull, twist, climb, mouth objects, and test equipment in ways adults may not anticipate.
Anything attached to a wall should be treated as something the child may eventually pull with considerable force.
Toddler Safe Materials: What to Use and What to Avoid
Choose durable materials that are:
- Nontoxic
- Washable
- Smooth around edges
- Large enough not to create a choking hazard
- Resistant to breaking or splintering
- Appropriate for the child's age
Possible materials include securely attached fabric, sealed wood, closed cell foam, large plastic components, acrylic mirror panels, and commercial toddler activity hardware.
Avoid materials that can:
- Shatter
- Splinter
- Shed small pieces
- Expose sharp edges
- Create loops around the neck
- Pinch fingers
- Contain accessible batteries
- Become detached when pulled
- Contain toxic paint or finishes
Inspect homemade equipment regularly.
Mounting Methods and Structural Safety
Sensory wall panels should be securely anchored into appropriate wall structure.
Do not assume adhesive strips or lightweight picture hanging hardware are sufficient.
The safest mounting method depends on:
- Wall construction
- Panel weight
- Activity type
- Expected pulling force
- Manufacturer instructions for mounted components
If you are uncertain about the wall structure or mounting hardware, ask a qualified professional.
Toddlers should not be able to climb onto panels or use attached components as footholds.
Choking Hazard and Allergen Considerations
Avoid loose:
- Beads
- Buttons
- Magnets
- Nuts
- Bolts
- Bells
- Decorative stones
- Small gears
- Marbles
- Detachable craft pieces
Magnets and button batteries deserve particular caution because swallowing them can cause severe injury.
Also consider possible material sensitivities or allergies when choosing fabrics, rubber, adhesives, paints, and natural materials.
DIY Sensory Wall Ideas for Toddlers
One advantage of a DIY sensory wall is that you can begin with only a few activities and expand it gradually.
Focus on quality and safety rather than filling every available inch.
Texture Panels: Fabrics, Foam, Cork, and Natural Elements
Create separate sections featuring contrasting textures.
Possible materials include:
- Fleece
- Felt
- Corduroy
- Smooth sealed wood
- Foam
- Cork
- Textured plastic
- Artificial grass designed for safe indoor use
Mount each material securely so toddlers cannot peel off pieces.
Avoid loosely attached natural materials that may crumble, splinter, mold, or become choking hazards.
Color and Light Features for Visual Engagement
Simple visual features can include:
- Color blocks
- High contrast patterns
- Large shapes
- Reflective surfaces
- Color mixing panels
- Child safe light features
If using LED lighting, keep electrical connections, cords, batteries, and power supplies completely inaccessible to the child.
Commercially designed enclosed lighting is preferable to exposed DIY wiring.
For additional visual sensory ideas, browse Sensory Products.
Sound Making Elements: Crinkle Panels, Bells, and Chimes
Auditory activities can introduce cause and effect.
Safer ideas may include:
- Sealed crinkle fabric panels
- Large enclosed sound modules
- Securely mounted percussion surfaces
- Commercial toddler musical panels
Use caution with bells and chimes. Many contain small pieces that could detach.
Sound should also be optional. A child who is sensitive to noise may prefer a sensory wall without strong auditory features.
Interactive Activity Panels: Zippers, Buckles, Velcro, and Buttons
Functional activities can make a sensory wall especially engaging.
Ideas include:
- Large zippers
- Large buckles
- Hook and loop closures
- Door style latches designed for children's activity panels
- Large switches
- Sliding panels
- Turning wheels
- Large gears
- Push buttons
These activities may encourage grasp, bilateral hand use, coordination, and problem solving.
Avoid mechanisms that create finger pinch points.
Water and Sensory Play Wall Features for Outdoors
An outdoor sensory wall can incorporate water in ways that would be impractical indoors.
Possible activities include:
- Funnels
- Large tubes
- Water wheels
- Pouring channels
- Splash panels
- Large cups
- Guttering systems
Make sure all pieces are securely attached and large enough for toddler use.
Drain the system after play and clean it regularly to prevent standing water and buildup.
For more hands on sensory play ideas, explore Sensory Tables.
Mirror and Reflection Panels for Self Awareness
Mirrors can encourage toddlers to observe facial expressions, movements, and body positions.
Use acrylic or another child appropriate shatter resistant mirror material rather than ordinary household glass.
Mount mirrors securely with smooth edges completely covered or enclosed.
DIY Sensory Wall Ideas Specifically for Toddlers with Autism or SPD
A sensory wall for a child with autism or sensory processing differences should be individualized.
More stimulation is not automatically better.
Consider what the child:
- Seeks
- Avoids
- Enjoys
- Tolerates
- Finds overwhelming
An occupational therapist may provide helpful guidance when sensory differences significantly affect daily activities.
You can also read Occupational Therapy Equipment for Autism: A Guide.
Calming vs. Alerting Sensory Elements: Finding the Right Balance
Features sometimes described as calming may include:
- Simple repetitive activities
- Soft textures
- Muted visual elements
- Predictable movements
More stimulating features may include:
- Bright lights
- Rapid movement
- Loud sounds
- High contrast patterns
- Complex activity panels
These categories are not universal.
Something considered calming for one child may be stimulating for another.
Start with fewer elements and add activities based on the child's response.
Deep Pressure and Proprioceptive Features to Include
Proprioceptive activities involve muscles and joints and often include pushing, pulling, or resistance.
A sensory wall could include a professionally designed push panel or other securely mounted resistance based activity.
Exercise bands and resistance cords require additional caution. They can snap, detach, wrap around the body, or create unsafe forces if incorrectly installed.
For toddlers, improvised resistance bands attached to a wall should generally be avoided unless the activity has been specifically designed and supervised for that purpose.
Safer proprioceptive play can also happen away from the wall through pushing, carrying, climbing, crawling, or other age appropriate activities.
Sensory Board for Autism: Key Design Principles
For children who become overwhelmed easily, simpler may be better.
Consider:
- Clear separation between activities
- Predictable placement
- Limited visual clutter
- A manageable number of features
- Activities the child can control
- Quiet options
- Familiar textures
- Easy access at the child's height
The goal is not to expose the child to every type of sensory input simultaneously.
Sensory Wall Ideas for Different Settings
The ideal sensory wall changes depending on where it will be used.
DIY Sensory Wall for the Home Playroom or Bedroom
Home sensory walls can be relatively small.
A few carefully selected panels may be enough.
Consider locating the wall:
- Away from stairs
- Away from furniture that encourages climbing
- Away from doors
- Away from electrical outlets
- Where adults can supervise easily
For bedrooms, quieter tactile and visual features may be more appropriate than loud sound making activities.
Sensory Wall for Preschool and Classroom Environments
Classroom sensory walls need to withstand use by many children.
Look for:
- Durable construction
- Washable materials
- Secure mounting
- Rounded edges
- Easy cleaning
- Activities accessible to different heights
- Adequate space around the wall
Teachers should also consider whether several children can use the wall without crowding.
For broader classroom planning, see Special Education Classroom Equipment Essentials.
Outdoor Sensory Wall Ideas for Backyards and Playgrounds
Outdoor walls can use weather resistant materials and incorporate nature.
Ideas include:
- Water channels
- Large spinning wheels
- Weather resistant mirrors
- Textured panels
- Large musical surfaces
- Color panels
- Gardening activities
Avoid untreated materials that can quickly splinter or deteriorate outdoors.
Regularly inspect outdoor equipment for rust, loose hardware, sharp edges, mold, and weather damage.
Step by Step: How to Build a Simple DIY Sensory Wall
A basic sensory wall does not require dozens of activities.
Starting small makes it easier to build safely and learn which features the child actually enjoys.
Planning Your Layout and Choosing a Wall Space
Begin by selecting a location that is easy to supervise.
Measure:
- Available wall width
- Available wall height
- Toddler standing reach
- Seated reach if applicable
- Space around the wall
Place frequently used activities where the child can reach them naturally without stretching or climbing.
Sketch the wall before buying materials.
Leave visual space between activities instead of covering every surface.
Gathering Materials and Tools
A simple project might require:
- Plywood or another suitable backing panel
- Sandpaper
- Child appropriate paint or finish
- Screws
- Appropriate wall anchors
- Fabric
- Foam
- Acrylic mirror
- Large activity hardware
- Zippers
- Buckles
- Hook and loop material
- Basic hand tools
Select fasteners and mounting hardware based on the wall construction and finished weight of the panel.
Assembling and Mounting Your Sensory Panels
Build and inspect the panel before mounting it.
Check that:
- Nothing is loose
- Screws are inaccessible
- Edges are smooth
- Activities cannot be pulled off
- Openings cannot trap fingers
- Cords cannot form loops
- Small components are inaccessible
After mounting, pull firmly on the panel and each activity to check stability.
Continue supervising toddlers during use even after the wall has been tested.
Refreshing and Rotating Elements to Keep Toddlers Engaged
You do not necessarily need to add more activities when interest declines.
Rotating a few safe components can make the wall feel new again.
You might periodically introduce:
- A different texture
- A new matching activity
- A different color panel
- A more challenging buckle
- A new cause and effect activity
Make sure removable features cannot be accessed or detached by the child unless they are specifically designed as toddler safe loose toys.
DIY Sensory Wall vs. Ready Made Sensory Wall Panels
Both approaches can work.
The right choice depends on your budget, available time, setting, safety requirements, and the complexity of the child's needs.
Pros and Cons of the DIY Approach
DIY sensory walls offer several advantages.
Advantages include:
- Lower potential cost
- Customization
- Ability to use available space
- Easy personalization
- Opportunity to start small
Potential limitations include:
- Time required to build
- Greater responsibility for safety
- Variable durability
- Difficulty creating complex mechanisms
- More frequent inspection and maintenance
A DIY sensory wall can be effective for simple supervised play, but homemade equipment should not automatically be considered equivalent to commercially manufactured therapeutic or institutional equipment.
When Professional Grade Sensory Wall Panels Are Worth It
Ready made sensory wall panels may make more sense when equipment will receive heavy use or needs to serve many children.
They may be particularly appropriate for:
- Preschools
- Special education classrooms
- Therapy clinics
- Sensory rooms
- Pediatric facilities
- Community centers
- Shared play environments
Commercial panels may offer more durable construction, enclosed mechanisms, predictable dimensions, and installation guidance.
Families and professionals can explore Sensory Room Equipment, Sensory Development, Tactile Stimulation for additional sensory activity options.
FAQs
How high should a sensory wall be for a toddler?
Place the most frequently used activities within the child's comfortable standing or seated reach. Toddlers should not need to stretch, climb, or stand on furniture to access the wall.
If children of different ages will use the wall, spread activities across several reachable heights while keeping climbing temptations to a minimum.
What is the best age to introduce a sensory wall?
Sensory walls can be introduced during the toddler years when the activities are developmentally appropriate and designed without small parts, sharp edges, accessible cords, or other hazards.
The activities should match the child's current motor skills rather than relying only on chronological age.
How many activities should I put on a toddler sensory wall?
More is not necessarily better. Starting with about four to eight clearly separated activities can make the wall easier to explore without creating excessive visual or sensory stimulation.
Additional features can be introduced gradually after observing which activities the child actually enjoys.
Should sensory wall activities be removable?
For toddlers, permanently secured activities are usually safer than pieces that can easily be pulled off.
If removable components are used, they should be specifically designed as age appropriate toys and large enough that they do not create a choking hazard.
Can I use household objects on a DIY sensory wall?
Some household objects may appear interesting but are not necessarily safe for toddler use.
Avoid attaching objects that contain:
- Small detachable pieces
- Sharp edges
- Accessible springs
- Glass
- Magnets
- Button batteries
- Long cords
- Finger pinch points
Whenever possible, choose materials designed for young children.